Pro Liquid Bundle
$64.94
*Pro Liquid Bundle*
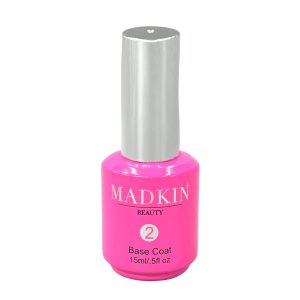
Comes with:
1~Primer (Step 1)
1~Base Coat (Step 2)
1~Activator (Step 3)
1~Top Coat (Step 4)
1~ Brush Saver
1~ Cuticle Oil-Signature scent
1~ Cuticle Orange Stick
1~ Step-by-Step Instructions
The Pro Liquid Bundle comes with the all liquids above.
Liquids:

~ Self leveling
~ Not easily contaminated
~Air Dry Top Coat gives Gel Shine appearance
~ Medium viscosity base coat
~ Low Odor
MadKin’s Acrylic Powders are specifically designed for (best) use with our liquids. Liquids are designed for MadKin’s acrylic line but will work with any quality acrylic brands. Liquids are self leveling and have more of a medium set so work with ombre and chunky glittered acrylic is easier.
MadKin Dipping Kit Instructions
- Wash your hands in warm water & make sure your liquids are at room temp. Glass is a really good insulator & if your liquids are cold, the Top Coat will NOT dry.
- Buff all surfaces of your natural nails, removing all the shine, push back the cuticles & clean off all nails with our special formulated Nail Cleanser. (Purchased seperatly). Apply tips at this point if you are going to.
- Apply Primer & BondAid (Step 1) to all of your natural nails.
- Shake all powders to mix them well due to settlement when stored. One nail at a time, apply a THIN layer of Base Coat (Step 2) to your nail then slowly dip into our Pure Diamond Clear Powder. Wait for a couple seconds before you dust off the excess with our dust brush. I normally dip one nail, dip another one, then go back to the other nail and dust it, do another nail & then go back to the previous nail & dust it off. This allows the nail to dry so you don’t get brush ripples in the powder on the nails. Repeat on all of your nails.
- Repeat #4 on all nails using the color of choice & apply 2-3 layers of the desired color, then always encapsulate in the Pure Diamond Clear. Encapsulating in clear gives the nail its strength and prevents you from filing of any color or glitter when shaping.
- Apply a generous coat of Activator (Step 3) to all hails & wait AT LEAST 4 mins until nails have hardened with no tacky feeling. This step is VERY IMPORTANT to actually time. The activator MUST have time to soak thru & harden all the layers of acrylic that you have applied. If it does not dehydrate all the way thru, you will have Top Coat drying issues.
- File, Shape & buff all nails. Wipe all nails off again with the Nail Cleanser, removing all dust.
- Apply another layer of Activator (Step 3). Allow it to dry for about 30 seconds. If a shattered glass look occurs on the finished Top Coat when it is dry, especially medical care providers, you may not need this extra step of activator. Judge accordingly.
- Apply an EXTREMELY THIN layer of Air Dry Top Coat (Step 4) to all nails and let dry for about 5 mins. TIME THIS STEP!! If it isn’t fully dry, the next layer of Top Coat you apply for shine will take forever to dry.
- Once dry, apply another layer of Top Coat for shine. Add your cuticle oil to nail beds to moisturize & use as needed during the day. Remove with 100% acetone.
For more information visit MadKinBeauty.com and for tips and inspo, follow us on all our social media,